Connecting MySQL with OpenOffice Base
Sunday, 17 February 2008
OpenOffice Base makes it incredibly easy to hook up to a MySQL database. Once this is accomplished you can easily create a front end to browse through your data, edit it, report on it, etc.
Below are a few steps I took to create a functional setup:
- Install OpenOffice
- Have access to a database (for this example I used my wp_posts table from WordPress) from the workstation running OpenOffice
- Download MySQL® Connector/J and install
- Within OpenOffice, click “Tools > Options > OpenOffice.org > Java > Class Path… > Add Archive…”
- Select “mysql-connector-java-5.1.5-bin.jar” or current version
- Restart OpenOffice (make sure the process is fully “killed”)
- Create a new database within OpenOffice
- click “File > New > Database”
- click the “Connect to an existing database” radio button
- select “MySQL” from the drop down list
- click the “Next >>” button
- select the “Connect using JDBC (Java Database Connectivity)” radio button
- click the “Next >>” button
- enter the “Name of the database” into the text field
- enter the MySQL “Server URL” into the text field
- click the “Test Class” button and wait for “The JDBC driver was loaded successfully” message
- click the “Next >>” button
- enter “User name” into the text field
- check the “Password required” checkbox
- click the “Finish” button and save
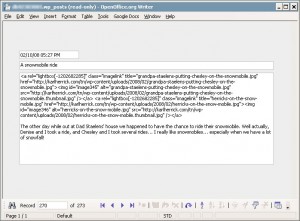
- Make a form based on wp_posts:

