Arrival of the Raspberry Pi
Wednesday, 06 June 2012
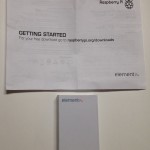
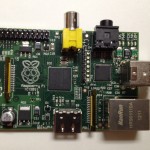
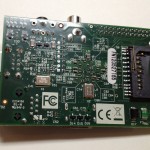
I got the Raspberry Pi in yesterday and wanted to show what came with it as well as my first steps. Pictured below is the packaging, top, and bottom view of the board:
- I’d start with Debian (they have images pre-built and I am comfortable in that world).
- I needed some parts.
The funny thing is, so far I’ve spent more on parts than I have on the unit itself… 🙂
- Raspberry Pi: $35.00 (Element14)
- Case: £7.99 (ModMyPi / hasn’t arrived yet, as I just recently ordered it)
- HDMI 6ft: $27.99 (local grocery store)
- 16 GB SDHC Class 10: $29.88 (local grocery store)
- USB A to Micro B cable: $12.99 (local grocery store)
- USB Wall Plug for the USB A to Micro B cable: (Already had it. 1000 mA / 5V DC. The Quick Start guide suggests: Micro USB power supply – make sure you use a good quality one, capable of providing at least 700mA at 5V. Do not attempt to power your Raspberry Pi by plugging it into a computer or a hub.)
The actual software installation steps and boot-up were fairly straightforward as I generally followed procedures @ http://downloads.raspberrypi.org/verifying_an_image.html and http://elinux.org/RPi_Easy_SD_Card_Setup (which I have recompiled into one list below):
- Download: http://downloads.raspberrypi.org/images/debian/6/debian6-19-04-2012/debian6-19-04-2012.zip to the Downloads folder
- Run “df -h” to figure out what drives are in the system
- Insert an SD card of an appropriate size into the Mac and run “df -h” again. Look for the new device that wasn’t listed last time. Record the device name of the filesystem’s partition: e.g. /dev/disk1s1
- Unmount the partition so that you will be allowed to overwrite the disk with the “diskutil unmount /dev/disk1s1” command
- Using the device name of the partition work out the raw device name for the entire disk, by removing the “s1” and replacing “disk” with “rdisk”: e.g. /dev/disk1s1 => /dev/rdisk1
- Run the following to write the image to the card: “dd bs=1m if=~/Downloads/debian6-19-04-2012/debian6-19-04-2012.img of=/dev/rdisk1”
- Eject the card via “diskutil eject /dev/rdisk1”
- Put the SD card into the Raspberry Pi
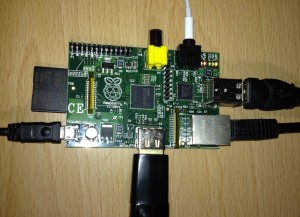
- Connect all the cables
After the “connect all the cables” part my Pi was ready to power on:
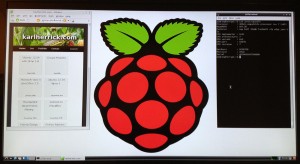
Once plugged in, boot up was fairly quick. I typed in the default username and password, issued a ‘startx’ and was presented with an LXDE desktop (on my 1080p – 40 inch monitor):
More info at the quick start guide: http://www.raspberrypi.org/quick-start-guide. Now all I have left is to figure out exactly what I am going to do with it.
My first impressions after spending twenty minutes in LXDE:
- Negative: had issues with sound that came with the Debian build, and it appears as though the graphics acceleration isn’t operating properly (windows did not move smoothly as they were moved around the desktop, even at low CPU usage).
- Positive: It works. Low power. Lost cost. Linux.
