Logging motion with the Raspberry Pi
Thursday, 06 September 2012
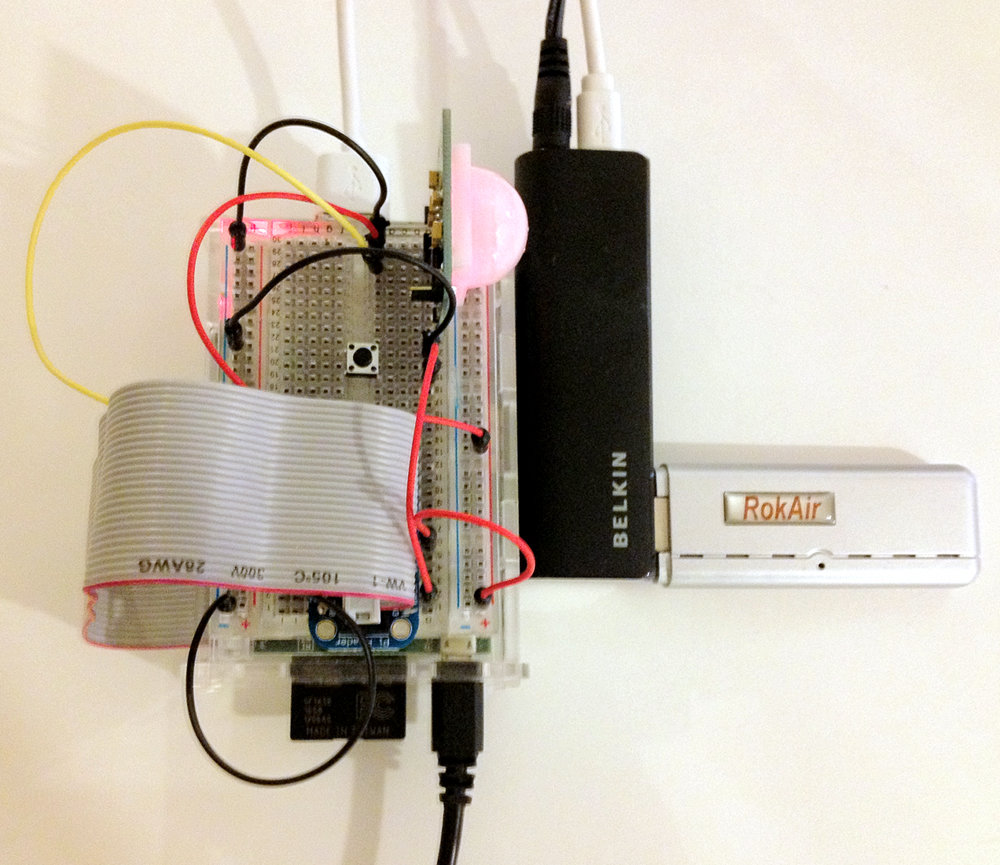
Since purchasing the Pi Cobbler Breakout Kit I wanted to digitally plan out the project before connecting a single wire. There seems to be a lot of choice for circuit design software (open source even), but the one I chose is called Fritzing.

After I began to download it, I found out that Adafruit has a library of parts that they update for this very software. I realize it isn’t an enormous leap from lighting an LED with a Raspberry Pi to controlling a PIR sensor, but the amount of fun I’ve been having with the ecosystem surrounding this device (and devices like it, whether single-board microcontrollers or single-board computers) compels me to announce my findings. Even the more minutely incremental.
A Raspberry Pi that logs motion it detects:
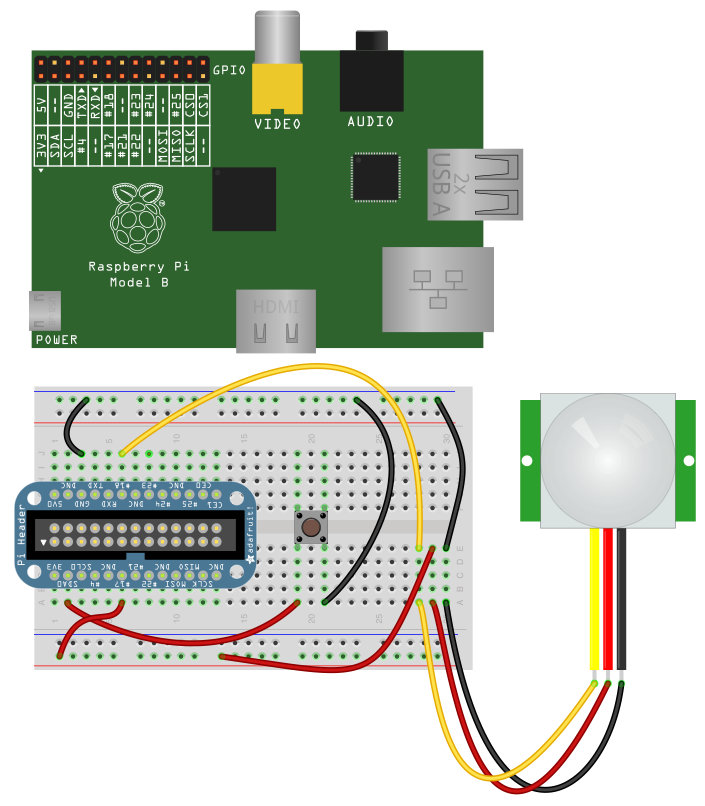
While viewing using Fritzing, you can see where positive and negative flow throughout the circuit, move wires around, add more parts, etc. I didn’t connect the breakout kit to the Raspberry Pi in software as I was unsure of how to represent a twenty-six pin ribbon cable, but the rest is there.
Currently, the button turning on the motion detector, and the motion detector doing the logging runs the following scripts below. To install, test and build on, copy/paste them into two files placed in the same directory, then run button.sh. From there, motion.sh is called when pressing the button and stopped when pressing it again. As you can see, I tried to model the scripts similar to the way the Arduino programming language has a setup and loop function.
There’s obvious room for improvement. Play a sound when detecting motion. Log to a Google spreadsheet. You get the idea.
source for button.sh
#!/usr/bin/env bash

function setup {
  button=0 #sda0 pin where the button is connected
  state=0 #the initialized state value of the pir sensor
  oldstate=0 #the initialized old state value of the pir sensor
  val=0 #the initialized pin value
  oldval=0 #the initialized old pin value
}

function loop {
  while true; do
    val=`gpio -g read $button`
    if [[ $val -eq 1 && $oldval -eq 0 ]]; then
      state=$((1-$state))
      sleep .1
    fi

    oldval=$val

    if [[ $state -eq 1 ]]; then
      if [[ $oldstate -lt $state ]]; then
        #echo disabled
        if [[ "$motionPID" != "" ]]; then
          clear
          echo attempting to kill motion.sh and disable the PIR sensor
          kill $motionPID
          gpio -g write 17 0
        fi
        clear
        echo Press the button to enable the PIR sensor and begin
          logging. Press the button again to disable. CTRL-C exits
          button.sh.
      fi
    else
      if [[ $oldstate -gt $state ]]; then
        #echo enabled
        `dirname $0`/motion.sh &
        motionPID=`echo $!`
      fi
    fi

    oldstate=$state
  done
}

setup; loop
source for motion.sh
#!/bin/bash
function setup {
  gpio export 17 out
  gpio -g write 17 1
  gpio export 18 in
  motion=0
  alert=0
  init=0
}

function loop {
  while true
  do
    if [ `gpio -g read 18` -eq 0 ]; then #no motion, no alert
      motion=0
      alert=0
      clear
    else #motion, no alert
      if [ $init -eq 0 ]; then
        echo The PIR sensor is initializing and calibration has
          begun... Sleeping for forty seconds. Please be as still as
          possible.
        init=1
        i=1; while [ $i -lt 41 ]; do echo $i; sleep 1; i=$(($i+1)); done
      fi
      if [ $alert -eq 0 ] && [ $init -eq 1 ]; then #motion, alert
        #aplay `dirname $0`/motion.wav > /dev/null 2>&1
        echo 'Motion has been detected: ' `date +"%Y-%m-%d_%H-%M-%S"`
        | tee -a `dirname $0`/motion.log
        alert=1
      fi
    fi
  done
}

setup; loop
UPDATE (2012-12-03): A better script for logging motion (and visualizing it) has been published at Visualizing Motion