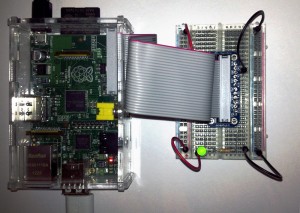
Lighting an LED on the Raspberry Pi
Wednesday, 29 August 2012
Since getting a Raspberry Pi I’ve wanted to use the GPIO pins, but have tried to heed the various warnings regarding static and other issues one might face like using 3.3v vs 5v devices or how much power peripherals draw. I could have started clipping onto the pins directly, but decided to progress cautiously and get them in a more test friendly environment. Not that I wont fry anything now, I’m just trying to be methodical about it.
So I went out and purchased a breakout kit for it and followed the guide on soldering it together. Since, I’ve completed a similar experiment on the Arduino, I thought my first one on the Pi should be something along the lines of lighting an LED. It sort of seems like the “Hello, World!” of software development. First I needed a refresher on resistors (especially attempting to use the right ones) and how the breadboard works. Then I needed to find a way to get data down the pipes. I chose WiringPI.
WiringPi is a Wiring library written in C and should be usable from C++ and many other languages with suitable wrappers…
- https://projects.drogon.net/raspberry-pi/wiringpi/download-and-install/
- https://projects.drogon.net/raspberry-pi/wiringpi/pins/
- https://projects.drogon.net/raspberry-pi/wiringpi/the-gpio-utility/
I also found a tutorial on the WiringPi Author’s site that explained exactly what I wanted to do: GPIO Examples 1 – A single LED.

